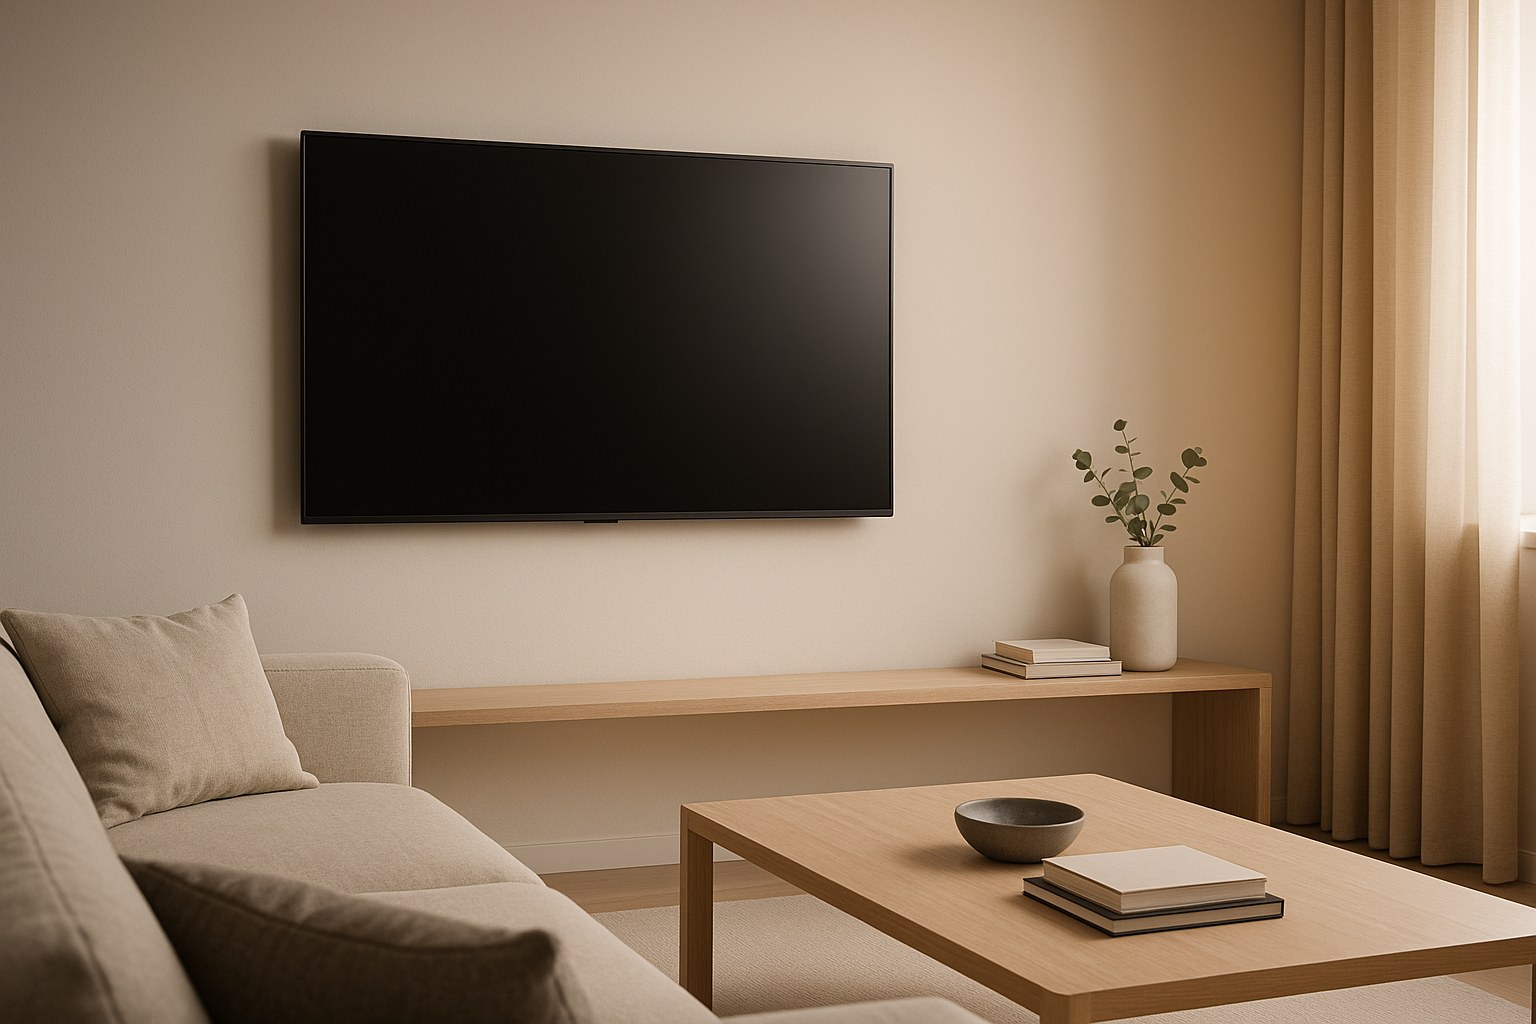
Mounting your TV on the wall is one of those home improvement projects that delivers a huge payoff. It frees up floor space, gives your room a clean and modern aesthetic, and can even provide a better viewing experience. But let’s be honest, the thought of drilling into your walls and trusting a small bracket to hold your expensive television can be a little nerve-wracking. What if you can't find a stud? What if you hit a wire? What if the TV falls?
Don't worry, we’ve got your back. Think of me as your friendly expert on the other end of the line, here to walk you through it. With the right preparation and a clear set of instructions, mounting a TV is a totally manageable DIY project for most homeowners. We'll break down the entire process, from ensuring your wall is ready for the job to hanging the TV and hiding those pesky cables.
So, let’s get that TV off the stand and onto the wall where it belongs!
Before You Start: Choosing Your Mount and Gathering Your Tools
Before we drill a single hole, let's talk about the gear. Success here is all about preparation.
What Type of TV Mount Do You Need?
TV mounts aren't one-size-fits-all. They come in three main varieties, each with its own pros and cons:
- Fixed Mounts: These are the simplest and most affordable option. They hold your TV flat against the wall, like a picture frame. They’re perfect if you have a dedicated spot where you'll always be watching from and don't need to adjust the angle.
- Tilting Mounts: A step up from fixed mounts, these allow you to tilt the screen vertically. This is incredibly useful for reducing glare from windows or if you need to mount the TV slightly higher than eye level, like over a fireplace.
- Full-Motion (or Articulating) Mounts: These are the most flexible option. They have a retractable arm that lets you pull the TV away from the wall, swivel it left or right, and tilt it up or down. They’re ideal for large rooms with multiple seating areas or for mounting a TV in a corner.
Tools and Materials Checklist
Having everything on hand before you start makes the process so much smoother. Here’s what you’ll likely need:
- Your television and the wall mount kit (which should include screws and washers)
- Stud finder
- Pencil
- Tape measure
- 4-foot level (a shorter one can work, but longer is better for accuracy)
- Drill with various drill bits
- Socket wrench set
- A friend! (Seriously, don't try to lift and hang a TV by yourself)
Step 1: Confirm Your Wall is Safe and Ready
This is the most important step. We need to know what’s inside your wall and where the strongest mounting points are. For this guide, we’re focusing on the most common wall type: drywall with wooden studs.
If you have a brick, concrete, or plaster wall, or walls with metal studs, the process is different and often requires specialized hardware. In those cases, we strongly recommend calling a professional to avoid damage.
Here’s how to check your wall:
- Identify the Wall Type: A simple way to check is to find a nearby electrical outlet or light switch. Carefully remove the cover plate and peek at the edge of the cutout. You should be able to see the thickness of the drywall. You can also give the wall a light knock; a hollow sound between studs is a classic sign of drywall.
- Locate the Studs: Wall studs are the vertical wood beams that make up your wall's frame. You must anchor your TV mount into these studs. Never use just drywall anchors—they will not hold the weight. Use your stud finder to slide horizontally across the wall where you want to mount the TV. It will beep or light up when it detects the edge of a stud. Mark the edges, find the center, and use your pencil to draw a light vertical line. Most studs are 16 inches apart, so find at least two.
- Check for Hidden Dangers: Now, switch your stud finder to its deep-scan or AC-detection mode. Scan over the same area again. This mode can help detect live electrical wires or pipes hidden in the wall. If your stud finder alerts you to anything in your chosen spot, stop. Pick a different location. Drilling into a pipe or wire is a dangerous and expensive mistake.
If you've found at least two wooden studs and there are no alerts for hidden pipes or wires, you’re ready for the next step!
Step 2: Check TV and Mount Compatibility
Next, let's make sure the mount you bought is a perfect match for your television. This involves checking two key things: the VESA pattern and the weight.
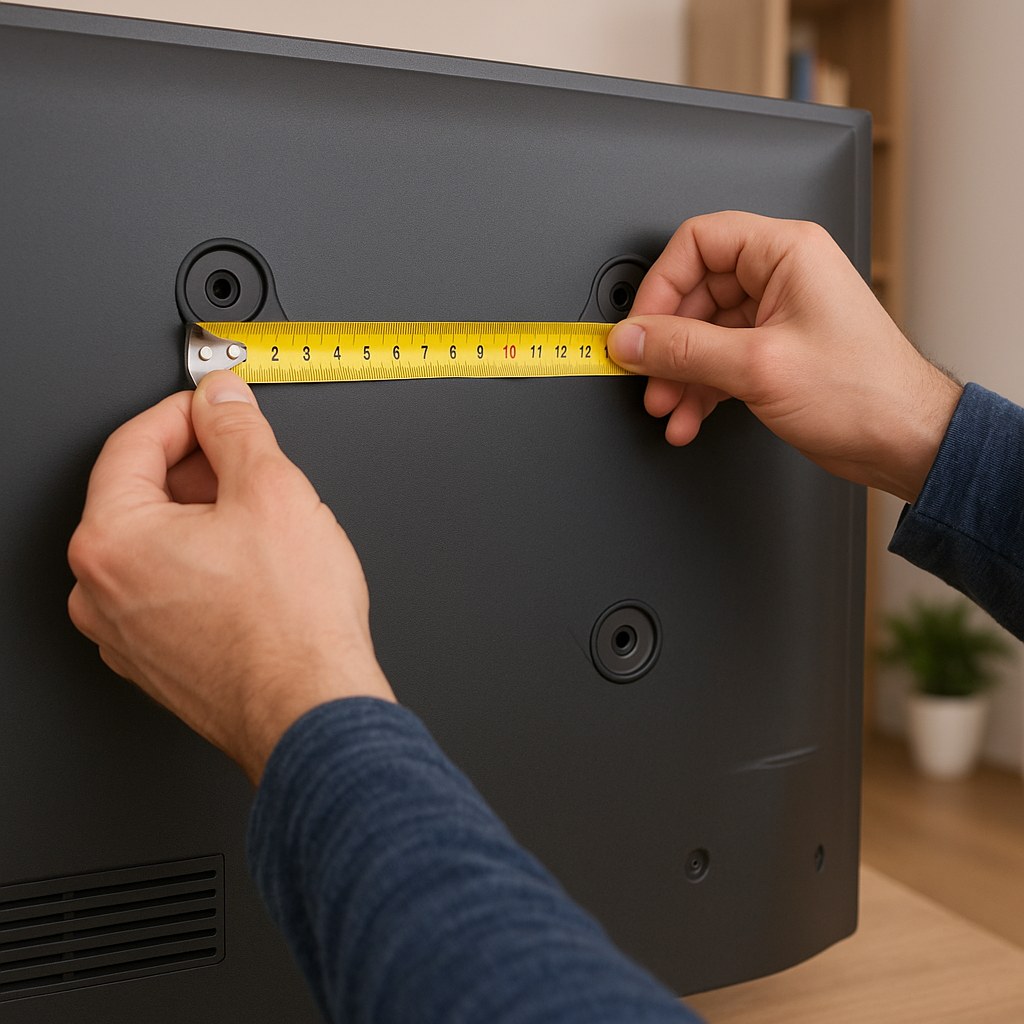
- Find the VESA Pattern: VESA is a standard used for TV mounting brackets. It’s simply the distance between the four mounting holes on the back of your TV, measured in millimeters. To find it, carefully lay your TV face-down on a soft surface, like a blanket, to protect the screen. Measure the horizontal distance between the holes and then the vertical distance. For example, if you measure 400mm across and 200mm down, your VESA pattern is 400x200.
- Check Your TV’s Weight: You can usually find the TV's weight (without the stand) in the owner's manual or by searching for the model number online. Don't guess!
- Cross-Reference with the Mount: Look at the box or instructions for your wall mount. It will clearly list the VESA patterns it supports (e.g., "fits VESA patterns 200x200 to 600x400") and the maximum weight it can safely hold.
If your TV’s VESA pattern and weight are within the mount’s supported range, you’re good to go. If your TV is too heavy (especially over 80 lbs) or the patterns don't match, you need a different mount. Don't risk it!
Step 3: Time to Install the Mount!
This is where the plan comes together. The process differs slightly depending on whether you have a fixed/tilt mount or a full-motion mount.
How to Install a Fixed or Tilt Mount
These mounts typically attach to a single stud, though wider models may span two.
- Position the Wall Plate: Hold the mount's wall plate against the wall. Decide on the height for your TV. A good rule of thumb is to have the center of the screen at eye level from your main seating position.
- Get it Level: Place your level on top of the wall plate. Adjust it until the bubble is perfectly centered. A crooked TV is a constant annoyance, so take your time here.
- Mark Your Holes: Once it's level and centered on a stud, use your pencil to mark the drill holes through the plate.
- Drill Pilot Holes: Set the plate aside. Using a drill bit slightly smaller than the lag bolts (the big screws) that came with your mount, drill pilot holes at your marked spots. The mount instructions will specify the correct bit size and depth (usually about 2 inches). This makes it much easier to drive the bolts in and prevents the wood stud from splitting.
- Attach the Wall Plate: Position the plate back on the wall and insert the lag bolts with their washers. Use a socket wrench to tighten them until the plate is snug and flush against the wall. Don't overtighten, but make sure it's completely secure. Give it a firm push; there should be no wobble at all.
- Attach Brackets to the TV: Screw the vertical mounting brackets onto the back of your TV using the screws provided in the kit. Make sure they are tightened snugly.
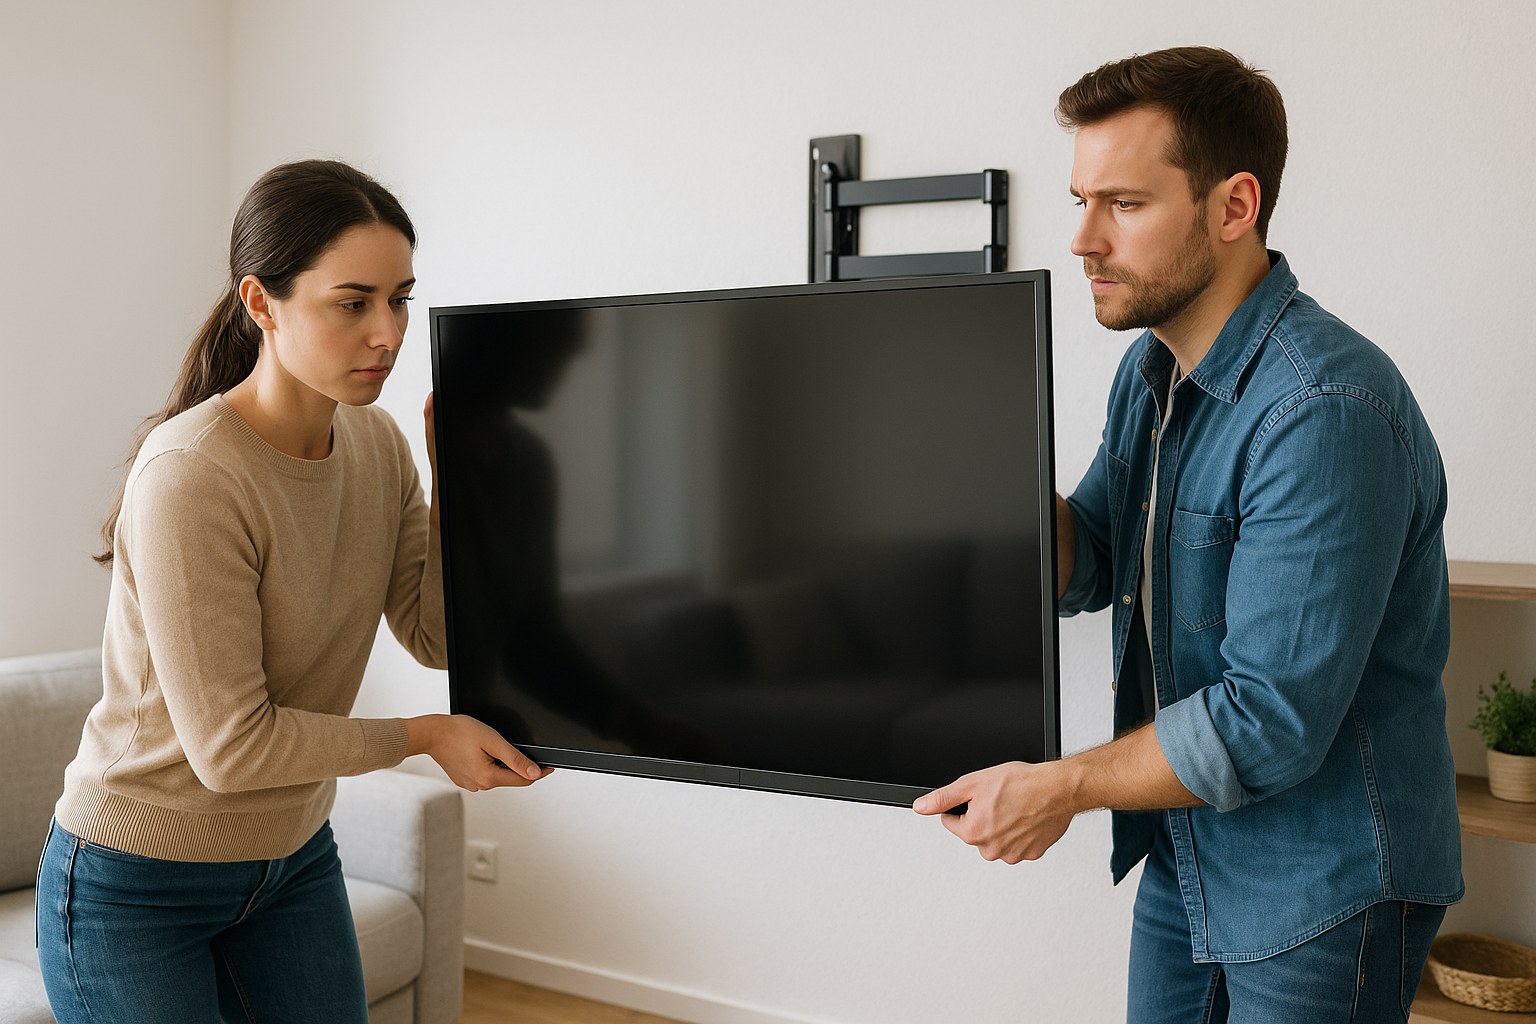
- Hang the TV: Now, grab your helper! Each of you should take a side of the television. Lift it carefully and hook the top of the brackets onto the top of the wall plate. Lower it gently until the bottom of the brackets also sit flush. Most mounts have safety locks or screws at the bottom—engage them to secure the TV in place.
How to Install a Full-Motion Mount
Full-motion mounts have a wider wall plate designed to be anchored into two studs for maximum support.
- Position the Wall Plate: Because of the leverage from the articulating arm, these mounts must be secured to two studs. Hold the plate against the wall at your desired height, ensuring it's centered across the two studs you located earlier.
- Level and Mark: Place your level on top and adjust until it's perfect. Mark your four drill holes (two for each stud).
- Drill Pilot Holes: Set the plate aside and drill your pilot holes as described before.
- Secure the Wall Plate: Position the plate and start by securing one of the top lag bolts, tightening it about halfway. This will hold it in place while you insert the other three. Once all bolts are in, tighten them firmly with your socket wrench until the plate is rock-solid. Give it a good tug—it shouldn't move at all.
- Attach Arms to the TV: Attach the mounting arms to the back of your TV.
- Hang the TV: This is another two-person job. With your helper, lift the TV and carefully hook the mounting arms onto the wall plate assembly. Follow the manufacturer's instructions to secure it, which usually involves tightening a set of locking screws.
Finishing Touches: Cable Management
Your TV is on the wall, but now you have a tangle of cables hanging down. Let's clean that up.
- On-Wall Raceways: The easiest solution is a plastic channel that sticks to your wall. You run the cables inside it and snap the cover on. You can even paint it to match your wall color.
- In-Wall Kits: For the cleanest possible look, you can use an in-wall power and cable kit. This involves cutting two holes in your drywall and feeding the cables through the wall. It’s a more advanced project but delivers professional results.
- Leave Some Slack: If you have a full-motion mount, make sure to leave enough slack in your cables so they don't get pulled or stretched when you move the TV.
When Should You Call a Professional?
DIY is empowering, but it’s also important to know your limits. It’s time to call a handyman if:
- You have brick, concrete, plaster, or metal-stud walls.
- Your stud finder detects potential pipes or wiring in your desired location.
- Your TV is very large and heavy (over 80 lbs), or you don't have a helper.
- The mount doesn't feel 100% secure after you've installed it.
The peace of mind that comes from a professional installation is well worth the cost, which typically ranges from $100 to $300.
You Did It!
Step back and admire your work. You've successfully mounted your TV, creating a more functional and stylish space. You tackled the planning, the measurements, and the installation like a pro.
For your next home project, or if you decide you need a hand with this one, download the Casa app. It's your go-to resource for clear, step-by-step DIY guides and instant access to vetted, local professionals for the jobs you'd rather leave to an expert. With Casa, you're never alone on your home improvement journey.


