Window grids, those elegant lines that give your windows a classic, multi-paned look, are a fantastic architectural detail. But when they become cracked, loose, or start to peel, they can quickly go from a charming feature to an eyesore. That rattling sound every time you close the window or the sight of a cracked grid can detract from your home's otherwise pristine appearance.
The good news? You don't have to live with it or immediately call a professional. Many common window grid issues are surprisingly easy to fix yourself with just a few tools and a little bit of patience. Whether your grids are made of wood, vinyl, or metal, we’re here to walk you through the process, just like a friendly expert on the phone.
In this guide, we'll cover everything you need to know about how to fix window grid issues, from initial inspection to full replacement.
Step 1: Inspect Your Grids to Know What You’re Working With
Before you can start any repair, you need to understand what type of window grids you have. There are two main categories: removable and integrated.
- Removable Grids: These are ornamental grids that sit on the interior side of your windowpane. They are designed to be popped out for easy window cleaning. They are typically held in place by clips, pins, or adhesive tabs.
- Integrated Grids: These grids are built directly into the window structure. They can be sealed between the panes of glass (common in double- or triple-pane windows) or be a permanent part of the window sash.
Figuring out which type you have is simple. Here’s how to inspect them:
- Safety First: Put on a pair of safety glasses to protect your eyes from any dust or small particles.
- Get a Good Look: Use a flashlight to get a clear view of the grid and where it meets the window frame.
- The Gentle Push Test: Gently press on a corner of the grid with your fingers. Does it move or feel flexible? Try to carefully lift or wiggle it. If it pops off or moves freely, you’ve got removable grids. If it’s completely rigid and doesn’t budge, it’s integrated.
If your grids are sealed between the glass panes, stop here. Fixing these requires disassembling the insulated glass unit, which can break the seal and lead to fogging. This is a job best left to a window repair specialist. However, if your integrated grids are on the surface or you have removable grids, let’s get to fixing!
How to Fix Removable Window Grids
Removable grids are the most DIY-friendly. Whether they're cracked, peeling, or just loose, here’s your action plan.
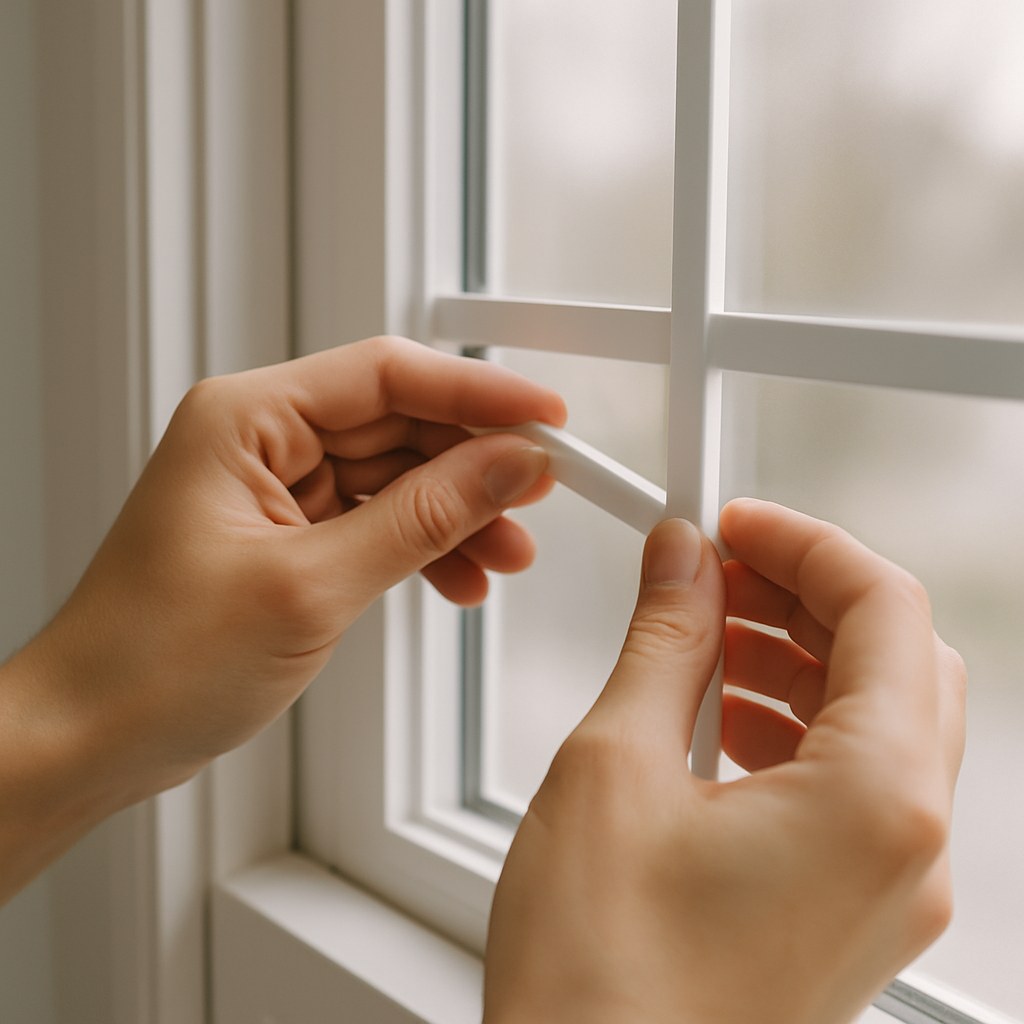
1. Removing the Grid Safely
First, you need to get the grid off the window without causing more damage.
- Create a Soft Landing: Place a folded towel or blanket on the floor beneath the window, just in case the grid slips from your hands.
- Release the Clips: If the grid is held in by clips, gently insert a putty knife between the grid and the window frame near a clip. A slight twist of the knife should be enough to pop it free. Work your way around the grid until all clips are detached.
- Lift and Place: Carefully lift the grid away from the window and lay it on a flat, clean surface like a workbench or a covered floor.
2. Repairing a Cracked or Broken Grid
If your grid is cracked or completely broken in one spot, you have two choices: repair or replace. A repair is often faster and more cost-effective for minor damage.
- Clean the Area: Use a microfiber cloth to wipe away any dust or debris from the broken edges.
- Choose Your Adhesive:
- For wood grids, a quality wood glue is perfect.
- For vinyl, metal, or composite grids, a strong two-part epoxy will create the most durable bond.
- Apply and Clamp: Apply a thin, even layer of your chosen adhesive to one side of the break. Press the pieces together firmly and hold for about a minute. Use a small spring clamp to hold the joint together while it cures (usually 20-30 minutes, but check the product instructions). Wipe away any excess glue that squeezes out before it dries.
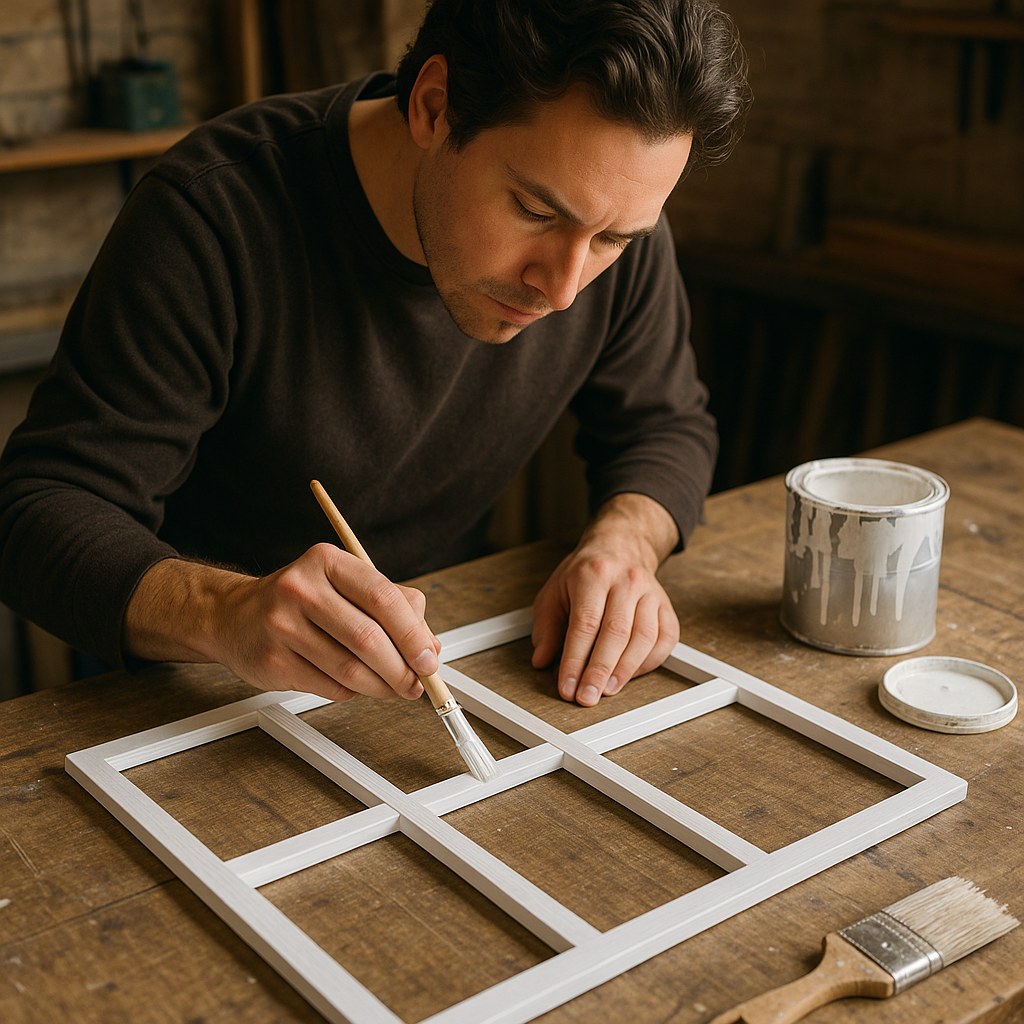
3. Fixing Cosmetic Issues: Chipped Paint and Scuffs
Sometimes the grid is structurally fine but just looks worn out. A fresh coat of paint can make it look brand new.
For Painted Wood Grids:
- Sand It Smooth: Lightly sand the entire grid with fine-grit sandpaper (220-grit is ideal) to smooth out imperfections and help the new paint adhere.
- Clean Up: Wipe away all the sanding dust with a tack cloth.
- Prime Bare Spots: Apply a thin coat of interior primer to any areas of bare wood. Let it dry completely.
- Paint: Using a small paintbrush, apply an even coat of interior paint that matches your window trim. Let it dry according to the paint manufacturer’s instructions before reinstalling.
For Vinyl, Metal, or Composite Grids:
- Clean Thoroughly: Clean the grid with a vinyl-safe cleaner or a general-purpose cleaner to remove any dirt and grease.
- Scuff the Surface: Vinyl and metal often have a glossy finish that paint struggles to stick to. Lightly scuff the surface with fine synthetic steel wool. This creates microscopic grooves for the paint to grip.
- Wipe Down: Use a tack cloth to remove any residue.
- Spray Paint: Use a spray paint designed for plastic or metal. Shake the can for at least a minute, then apply a light, even coat from about 8 inches away. It’s better to apply two light coats than one heavy one. Let it dry completely.
4. Securing a Loose or Rattling Grid
If your grid isn't damaged but simply fits loosely, there’s an easy fix for that annoying rattle.
- Remove the Grid: Follow the removal steps from earlier.
- Apply Adhesive: Place a small, pea-sized dot of clear, exterior-grade silicone adhesive on each of the grid’s clips or contact points.
- Reinstall and Press: Snap the grid back into place, pressing firmly on each spot where you applied the silicone for about 10 seconds.
- Let It Cure: Allow the adhesive to cure for at least 30 minutes before you operate the window. The silicone will provide a secure, yet flexible, hold that eliminates rattling.
5. Replacing the Grid Entirely
If the grid is too damaged to repair or you want a different style, replacement is straightforward.
- Measure and Match: Measure the height and width of your old grid and note the pattern (e.g., 6-pane, 9-pane). You can order pre-made replacement grids from home improvement stores or online retailers.
- Install the New Grid:
- For snap-in grids, simply insert the bottom tabs into the slots on the window frame, then gently push the top of the grid until the clips click into place.
- For adhesive grids, clean the glass thoroughly with glass cleaner. Peel the backing from the adhesive tabs on the new grid, carefully align it on the window, and press each tab firmly against the glass for 10-15 seconds.
How to Fix Integrated Window Grids
Fixing integrated grids is a bit more delicate, but minor surface-level repairs are definitely manageable.
1. Touching Up the Paint or Finish
For peeling paint or minor corrosion on integrated grids that sit on the surface of the glass (not between the panes):
- Protect Your Workspace: Lay a drop cloth on the floor and use painter’s tape to mask off the glass around the grid. This is the secret to getting sharp, professional-looking lines.
- Prep the Surface: Lightly sand any peeling areas (for wood) or scuff the surface (for vinyl/metal). Wipe away all dust with a tack cloth.
- Prime and Paint: Apply a suitable primer, followed by a matching paint using a small, angled paintbrush for precision. If you’re using spray paint for vinyl or metal, use cardboard or a spray shield to protect the rest of the window from overspray.
- Remove the Tape: Carefully remove the painter’s tape while the paint is still slightly wet to avoid peeling your new paint job.
2. Filling a Minor Crack
For a small, surface-level crack on an integrated grid:
- Clean the Crack: Use a small, stiff brush to clean out any debris from the crack.
- Mix Your Filler: Knead a small amount of two-part epoxy putty until it’s a uniform color.
- Fill and Smooth: Press the putty firmly into the crack, slightly overfilling it. Use a plastic scraper or a putty knife to smooth the surface so it's flush with the rest of the grid.
- Sand and Paint: Once the putty has fully cured (check the instructions, usually 15-20 minutes), lightly sand it smooth with fine-grit sandpaper. Touch up the spot with matching paint.
Cost Breakdown: DIY vs. Hiring a Pro
Fixing window grids yourself can lead to significant savings. According to home improvement resources like Angi, professional window repair can range from $175 to $550, depending on the complexity.
Here’s what a DIY fix might cost:
- Wood Glue or Epoxy: $5 - $15
- Sandpaper and Tack Cloth: $5 - $10
- Primer and Paint: $15 - $30
- Replacement Removable Grid: $25 - $75
For under $50, you can often handle most common repairs yourself in an afternoon.
When Should You Call a Window Repair Specialist?
While DIY is great, some jobs require a professional touch. It’s time to call for help if:
- The grids are sealed between the panes of glass.
- The damage to an integrated grid is severe (e.g., a large break or warping).
- The window frame or sash itself is damaged.

A Clear View Ahead
Fixing your window grids is a rewarding project that instantly boosts your home's appearance. By correctly identifying your grid type and following these steps, you can tackle everything from a loose rattle to a noticeable crack with confidence.
Want more expert guidance for all your home maintenance projects? Download the Casa app today! Casa provides easy-to-follow, step-by-step repair guides and can connect you with trusted, vetted professionals for the jobs you’d rather leave to an expert. Take control of your home maintenance with Casa in your corner.


