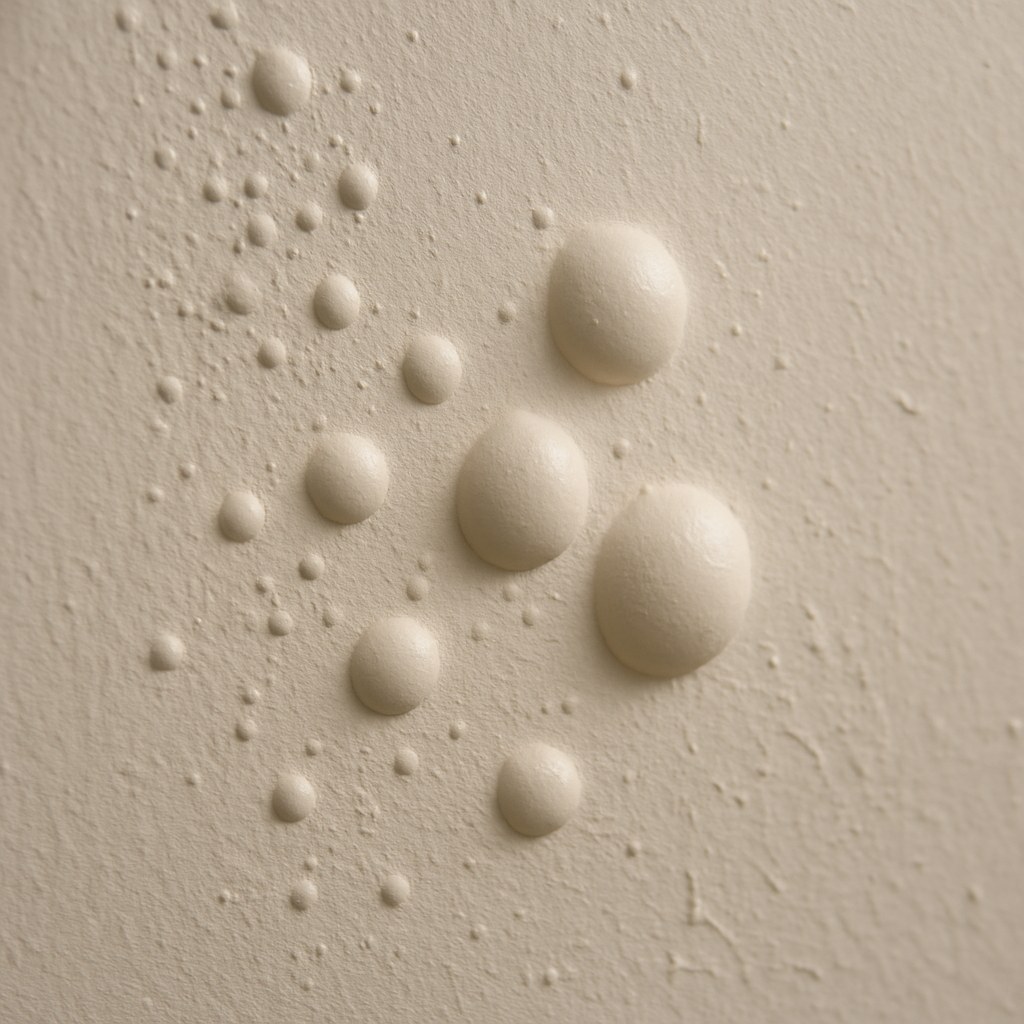
You’ve spent hours, maybe even days, prepping and painting a room. You step back to admire your work, only to see it: a cluster of bubbles and blisters marring your otherwise perfect finish. It’s a frustrating sight, but don’t worry—it’s a common problem with clear solutions. Bubbling paint is your wall's way of telling you that something went wrong, either during application or with the surface underneath.
The good news is that you can absolutely fix this. Whether the paint is still wet or has been dry for weeks, a little detective work and the right technique will have your walls looking smooth and flawless again.
In this guide, we’ll walk you through everything you need to know about how to fix bubbling paint. We'll start by identifying the root cause and then dive into the specific, step-by-step repairs. Think of us as your expert on the line, ready to help you get this sorted out.
Why Is My Paint Bubbling? Uncovering the Common Culprits
Before you can fix the problem, you need to understand what caused it. Paint bubbles, also known as blisters, form when a layer of paint loses adhesion to the surface underneath it. This pocket of air or moisture is what you see as a bubble. Here are the four most common culprits:
-
Moisture and Humidity: This is the number one cause of paint bubbles. If there's moisture trapped in the wall from a leak, high humidity, or condensation, it will try to escape, pushing the paint outward. This is especially common in bathrooms, kitchens, and basements. A musty smell or damp feel to the wall is a dead giveaway.
-
Surface Contamination: Paint needs a clean, dry, and slightly porous surface to stick to. If you painted over a wall that had dirt, grease, oil, or even just a fine layer of dust on it, the paint can't form a strong bond. This lack of adhesion eventually leads to blistering as the paint detaches from the contaminated spots.
-
Heat and Direct Sunlight: Applying paint to a surface that’s too hot or in direct, intense sunlight can cause the top layer to dry too quickly. This process, called "skinning," traps wet paint and solvents underneath. As these trapped solvents evaporate, they create gas pockets that push against the dried top layer, forming bubbles.
-
Improper Prep or Application: Sometimes, the issue lies in the technique. Applying paint too thickly can prevent it from drying evenly. Another classic mistake, especially in older homes, is applying a water-based (latex) paint directly over an old oil-based paint without the proper primer. The two types of paint are fundamentally incompatible and will not bond, causing widespread peeling and bubbling.
Now that you have a better idea of what might be going on, let's get to the fix.
Step 1: Diagnose the Problem – Is the Paint Still Wet?
Your first move is to determine the state of the paint. The fix for wet paint bubbles is very different from the fix for dry ones.
To check, find an inconspicuous spot and gently press a fingertip against one of the bubbles. If the paint feels tacky or leaves color on your finger, it’s still wet. If it feels hard and dry, you can skip to the next section.
If the Paint is Still Wet...
You might be in luck! Sometimes, bubbles that appear during application will settle down on their own as the paint cures. If they don't, you can try to smooth them out.
- Gently Brush Them Out: Take a clean paintbrush, dip it lightly into the same paint you used, and gently press the brush over each bubble to flatten it. Use light, feathery strokes to blend the area with the surrounding paint.
- Wait and Watch: Leave the area alone for about 30 minutes. Don’t touch it!
- Check Your Work: After 30 minutes, see if the bubbles have returned.
- If the bubbles are gone, you're all set! The issue was likely just a small air pocket from the roller.
- If the bubbles have returned, this indicates a deeper problem like moisture or surface contamination. Don’t try to fix it further while it's wet. The best course of action is to let the paint dry completely (this could take a few hours or even a full day) and then treat it as a dry paint bubble issue. Open windows or use a fan to improve airflow and speed up the drying process.
Step 2: How to Fix Dry Paint Bubbles
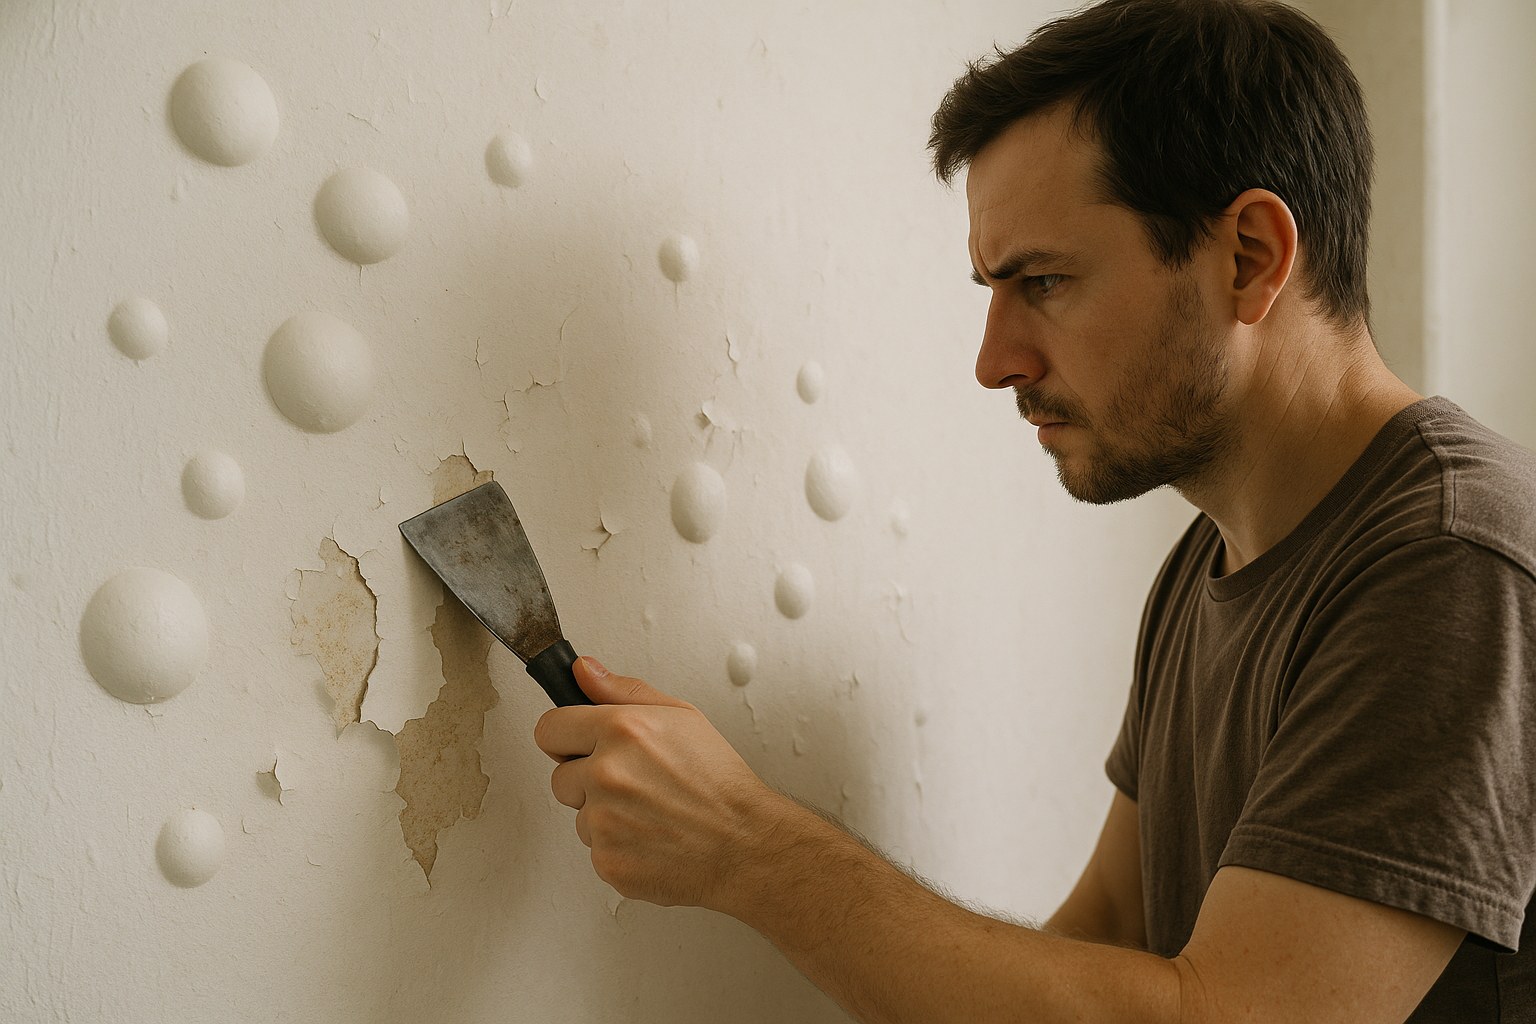
If the paint was already dry, or if your wet paint bubbles came back, it’s time for a more thorough repair. This process involves removing the bubbled paint, fixing the underlying issue, and then repainting.
Fix #1: Tackling a Moisture Issue
If you suspect moisture is the culprit (common in humid rooms or on walls with plumbing), you must address the source of the water before repainting.
- Find and Fix the Source: Is there a leaky pipe? Poor ventilation in the bathroom? Find the root cause and fix it. For ongoing humidity, running a dehumidifier until the room’s humidity is below 50% is crucial. Use a fan to help dry the wall surface itself.
- Scrape and Sand: Once the wall is completely dry, use a putty knife or paint scraper to carefully remove all loose, bubbling paint. Scrape until you reach a point where the paint is firmly attached. Then, use medium-grit sandpaper (around 120-grit) to feather the edges of the scraped area, creating a smooth transition to the rest of the wall.
- Clean the Surface: Wipe away all dust with a clean, damp cloth and let the area dry completely.
- Prime with a Sealer: This is the most important step. Apply a high-quality, oil-based, stain-blocking primer. This type of primer creates a barrier that prevents any residual moisture stains from bleeding through your new paint job. Let it dry according to the manufacturer's instructions.
- Repaint: Apply two thin coats of your original paint, allowing the first coat to dry completely before applying the second.
Fix #2: Dealing with a Dirty or Greasy Surface
If you think a contaminated surface caused the bubbles, the fix involves a deep clean.
- Scrape and Sand: As before, use a putty knife to remove all the bubbled paint. Sand the edges smooth.
- Clean Thoroughly: Mix a solution of mild dish soap and warm water. Using a sponge, scrub the entire affected area to remove any grease, dirt, or grime. Rinse the wall with a clean sponge and plain water, then dry it completely with a towel.
- Prime: Apply one coat of a quality latex primer to ensure the new paint has a perfect surface to adhere to.
- Repaint: Finish with two thin coats of your topcoat paint, allowing for proper drying time between coats.
Fix #3: Correcting Incompatible Paint Layers (Latex Over Oil)
This issue requires completely removing the new paint and starting over with the right prep.
- Scrape It All Off: The new latex paint will likely come off easily. Use a putty knife to scrape away all the peeling and bubbling paint.
- De-Gloss the Old Paint: The goal here is to scuff up the old, glossy oil-based surface so the new primer can grip it. Sand the entire wall with medium-grit sandpaper. You don’t need to remove the oil paint, just dull its sheen.
- Clean and Dry: Wipe away all the sanding dust with a damp cloth and let the wall dry.
- Use a Bonding Primer: This is non-negotiable. You must use a "bonding primer" specifically designed to adhere to slick, difficult surfaces. Apply one even coat and let it cure for the time recommended on the can.
- Repaint: Now you have a properly prepared surface. You can safely apply two coats of your desired latex paint.
Fix #4: Fixing a Thick or Rushed Paint Job
If you painted in direct heat or simply applied the paint too heavily, the fix is straightforward.
- Sand It Smooth: Use medium-grit sandpaper to sand down the bubbles until the surface is level and smooth. You may need to sand down to the original wall surface in some spots.
- Clean Up: Wipe away all the dust.
- Repaint Properly: This time, apply the paint in two thin coats. Load your roller with less paint and use consistent pressure. Be sure to wait for the first coat to be fully dry to the touch before starting the second.
What Does It Cost to Fix Bubbling Paint?
- DIY: Fixing paint bubbles yourself is very cost-effective. The materials are inexpensive—a putty knife, sandpaper, primer, and a small amount of paint will likely cost between $40 and $80, depending on what you already have. The main investment is your time, as you'll need to account for drying between steps.
- Hiring a Pro: If the job feels too big or if you can't identify the cause, a professional painter can help. According to HomeGuide, painters typically charge between $20 to $70 per hour. A small repair job could take a few hours, putting the cost in the $150 to $400 range.
Final Thoughts: Prevention is the Best Cure
Fixing paint bubbles is manageable, but avoiding them in the first place is even better. Always remember the keys to a perfect paint job: start with a clean, dry surface, use the right primer for the job, apply thin coats, and control your environment by avoiding extreme heat or humidity.
Tackling home repairs can feel daunting, but you don't have to do it alone. For more expert tips, personalized project guidance, and help finding trusted professionals in your area, download the Casa app today. We make it easy to manage any home maintenance task, from simple fixes to major renovations. Let Casa help you turn your home improvement frustrations into successes.


