Discovering a bulge or bow in your foundation wall is one of those heart-sinking moments for any homeowner. It looks serious, feels serious, and unfortunately, it often is. A bulging wall is a clear sign that your foundation is under immense pressure, and ignoring it can lead to catastrophic structural failure.
But don't panic. While this is a problem you need to address immediately, there are steps you can take to understand the severity of the issue and even mitigate the underlying causes yourself. Think of me as your expert on the line, walking you through exactly what to do.
In this guide, we'll cover everything from the initial safety checks to performing a detailed inspection, improving your yard's drainage, and recognizing the critical signs that mean it's time to call in a professional. Let's get your home back on solid ground.
What Causes Foundation Walls to Bulge?
Before we dive into the fix, it helps to understand what you're up against. A foundation wall doesn't just decide to bow on its own; it's being pushed. The primary culprit is almost always excessive lateral pressure from the soil outside. Here are the most common reasons this happens:
- Hydrostatic Pressure: This is the fancy term for water pressure. When the soil around your foundation becomes saturated from heavy rain or melting snow, it gets heavy. If your drainage system (gutters, downspouts, and ground slope) isn't directing that water away, it builds up and pushes against your foundation walls with incredible force.
- Expansive Soil: Certain types of soil, particularly clay, act like a sponge. They swell up when they absorb water and shrink as they dry. This constant cycle of expansion and contraction puts immense stress on your basement or crawlspace walls, causing them to bow and crack over time.
- Frost Heave: If you live in a cold climate, the moisture in the soil can freeze during the winter. When water freezes, it expands by about 9%, exerting thousands of pounds of pressure on your foundation. This is especially problematic if the soil is already waterlogged.
- External Pressure: Sometimes, the pressure comes from other sources. Large tree roots growing too close to the house, the weight of a poorly placed driveway or patio, or even heavy landscaping can contribute to the problem.
No matter the cause, the solution always starts with a safe and thorough inspection.
Step 1: Safety First A Crucial Pre-Inspection Checklist
Before you get close to that wall, we need to make sure the area is safe. A compromised foundation can create other hazards, and the last thing we want is for you to get hurt. Let’s run through a quick safety check.
- Gear Up: Put on some basic personal protective equipment (PPE). We're talking safety glasses, sturdy work gloves, and closed-toe, slip-resistant shoes.
- Light it Up: Basements and crawlspaces can be poorly lit. Grab a bright flashlight or a portable work light to ensure you can see every corner and crevice clearly.
- Clear the Area: Scan the floor for any tripping hazards. Move any boxes, tools, or stored items away from the foundation wall you need to inspect. Give yourself at least a 3-foot clearance.
- Check for Electrical and Water Hazards: Look carefully for any exposed electrical wiring or active water leaks near the bulging wall. If you spot either, stop immediately. Shut off the power at the breaker or the water at the main valve before you proceed.
- Look for Signs of Severe Instability: Take a step back and look for major signs of distress. Are there large, gaping cracks overhead? Is drywall crumbling or is dust and debris actively falling? If the area feels unstable in any way, do not enter. Your safety is more important than any inspection.
If you've checked all these boxes and the area feels secure, you're ready to move on to the inspection. If not, your first call should be to a qualified contractor.
Step 2: How to Inspect and Measure a Bulging Foundation Wall
Now it’s time to play detective. Your goal is to determine just how severe the bulge is. This measurement is the single most important factor in deciding your next steps.
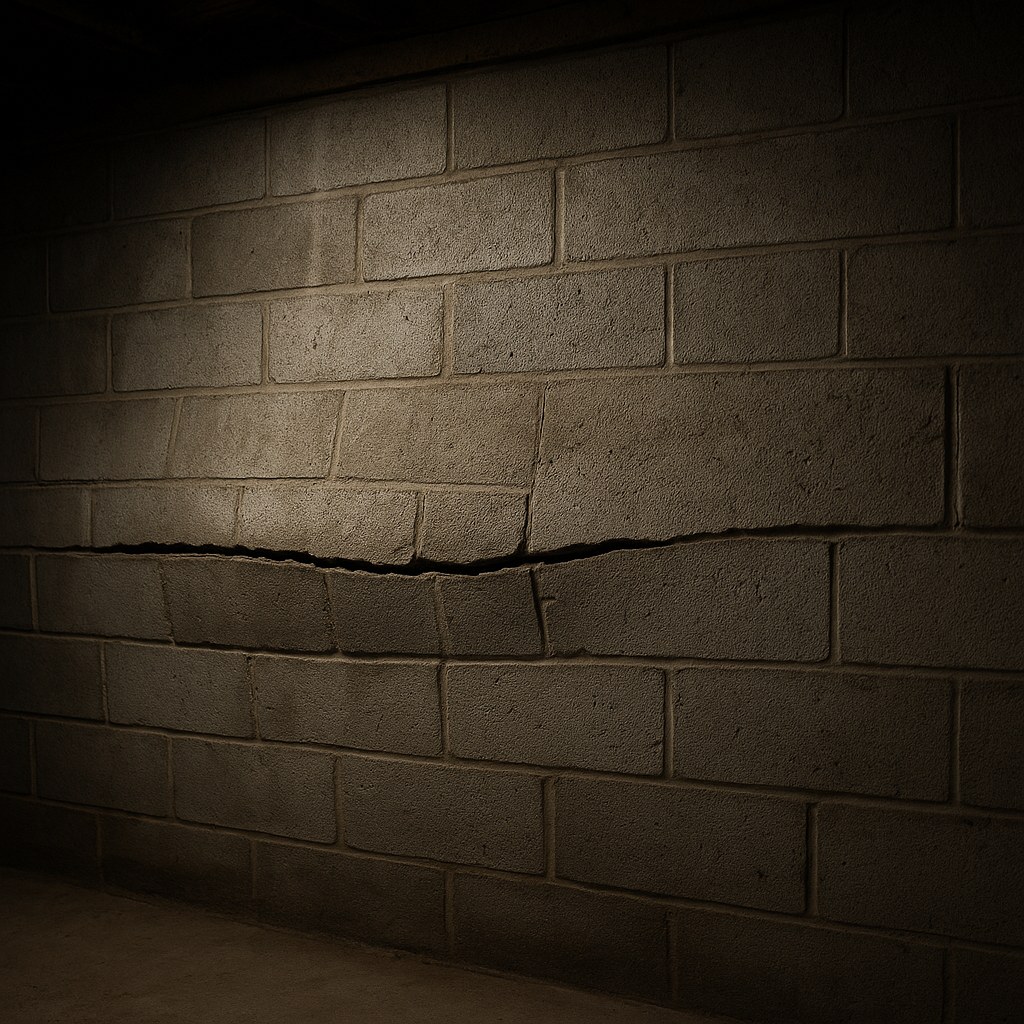
First, identify your wall material. Is it poured concrete (a single, smooth surface) or concrete blocks (you'll see the rectangular blocks and mortar joints)? Block walls are more susceptible to bowing and often show long horizontal cracks along the mortar lines when under pressure.
Here’s how to measure the bulge accurately:
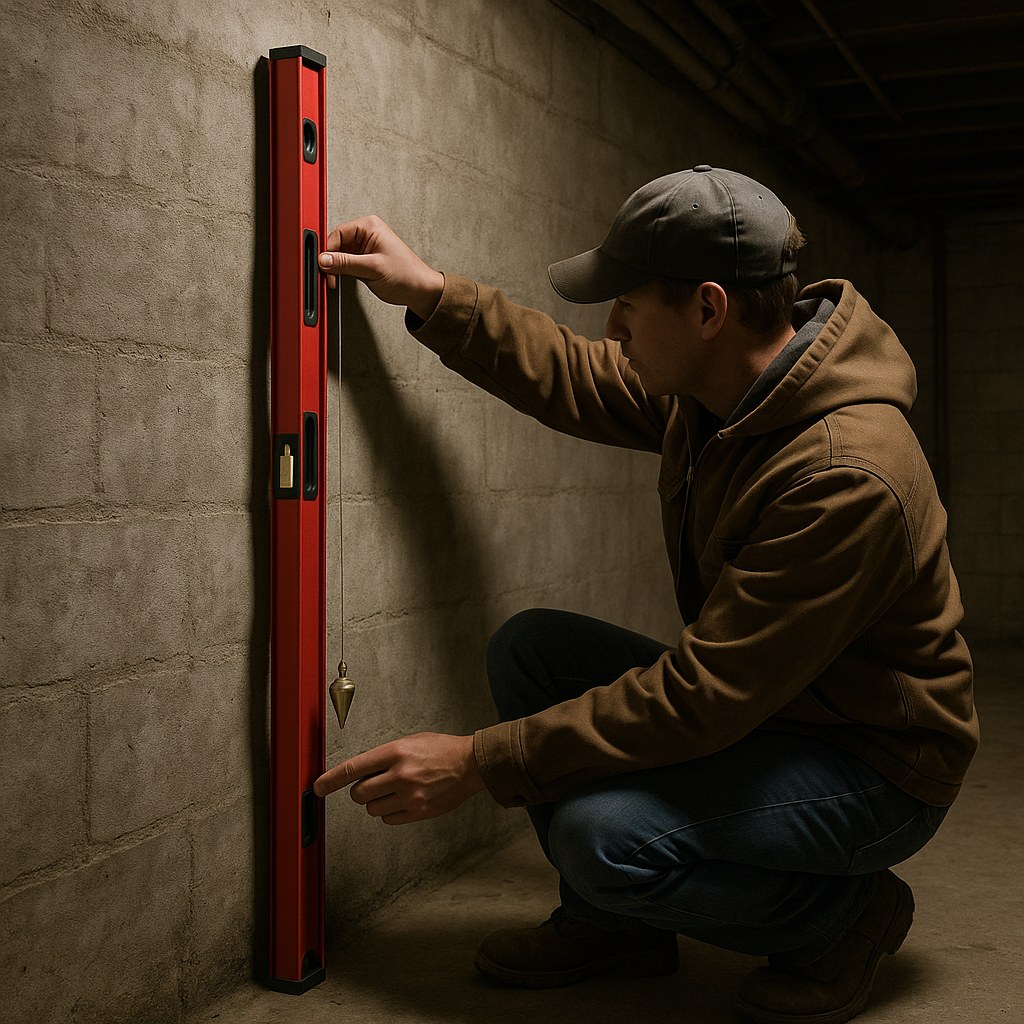
- Get Your Tools: You’ll need a 4-foot level and a plumb bob (a weighted string used to find a true vertical line).
- Position the Level: Find the most pronounced part of the bow. Place your 4-foot level vertically against the wall, holding it flat.
- Use the Plumb Bob: Hang the plumb bob from the top of the level. Let the string hang freely until it stops swinging.
- Take the Measurement: The critical measurement is the largest gap between the plumb bob’s string and the surface of the wall within that 4-foot span. Use a tape measure to get a precise reading.
The Critical Question: Is the bulge less than ½ inch over a 4-foot span?
- If YES (less than ½ inch): This is still a concern, but it may be minor enough that you can focus on addressing the root cause—likely a drainage issue. Continue to the next step.
- If NO (more than ½ inch): A bulge of this size or greater indicates significant structural stress. Stop here and call a licensed structural engineer or foundation repair contractor immediately. This is no longer a DIY situation.
While you're down there, look for other clues: water stains on the walls, puddles on the floor, or a white, chalky substance called efflorescence (which is evidence of moisture seeping through the concrete).
Step 3: Evaluate Your Home's Drainage System
As we discussed, water is public enemy number one for foundations. If your inspection revealed a minor bulge, your next mission is to find out where the excess water is coming from. The best time to do this is during or right after a heavy rain.
Walk around the outside of your home and look for these common drainage problems:
- Clogged Gutters: Are your gutters overflowing? Clogged gutters dump sheets of water right next to your foundation.
- Short Downspouts: Your downspouts should extend at least 6 feet away from your house. If they end right at the corner of your foundation, they are depositing all that roof water exactly where you don’t want it.
- Improper Ground Slope (Grading): The ground around your foundation should slope away from the house. The rule of thumb is a drop of at least 1 inch per foot for the first 6 feet. If the ground is flat or, worse, slopes toward your house, water will pool against the foundation.
- Standing Water: Do you see puddles forming within 10 feet of your foundation after it rains? This is a red flag for poor drainage.
Step 4: Simple DIY Drainage Fixes to Relieve Pressure
If you found drainage issues, there’s good news! These are often straightforward and inexpensive to fix. Correcting these problems can reduce the hydrostatic pressure on your walls and prevent the bulge from getting worse.
- Clean Your Gutters: Put on your gloves, get on a sturdy ladder, and scoop out all the leaves and debris. Flush the gutters with a hose to make sure they are clear.
- Add Downspout Extensions: This is one of the easiest and most effective fixes. You can buy plastic or metal extensions at any home improvement store. Simply attach them to your existing downspouts to carry water far away from your foundation.
- Improve the Grade: If the soil slopes toward your house, you’ll need to build it up. Buy a few bags of topsoil and use a shovel and rake to create a gentle slope away from the foundation wall. Remember the 1-inch-per-foot rule!
After you’ve made these fixes, wait for the next heavy rain and inspect the area again. Is the water now flowing away from the house? Are the puddles gone? If so, you've taken a huge step in protecting your foundation. Continue to monitor the wall every few months to ensure the bulge isn’t worsening.
When It’s Time to Call a Professional
DIY fixes are great for managing the cause of the pressure, but they don't fix the bulge itself. You need to call a professional foundation repair contractor if:
- The bulge measures more than ½ inch over a 4-foot span.
- You see large, horizontal, or stair-step cracks accompanying the bulge.
- You’ve fixed the drainage issues, but the wall continues to move or new cracks appear.
- You simply feel the problem is beyond your comfort level or expertise.
A professional has specialized tools and techniques to stabilize the wall, such as installing carbon fiber straps, steel I-beams, or wall anchors. According to Forbes Advisor, the average foundation repair can cost between $2,160 and $7,789, with major structural work exceeding $15,000. It's a significant investment, but it's essential for protecting the structural integrity of your entire home.

Don’t Face Foundation Problems Alone
A bulging foundation wall is a serious issue that requires immediate attention. By following this guide, you can safely assess the situation, address common drainage problems, and know exactly when to call for professional help.
Feeling overwhelmed? You don’t have to figure it out alone. Download the Casa app today. Our app provides more step-by-step guides for manageable DIY tasks like improving your home's drainage. And when the job is too big, Casa can connect you with vetted, licensed foundation repair contractors in your area. Take control of your home’s health and safety with Casa in your corner.


