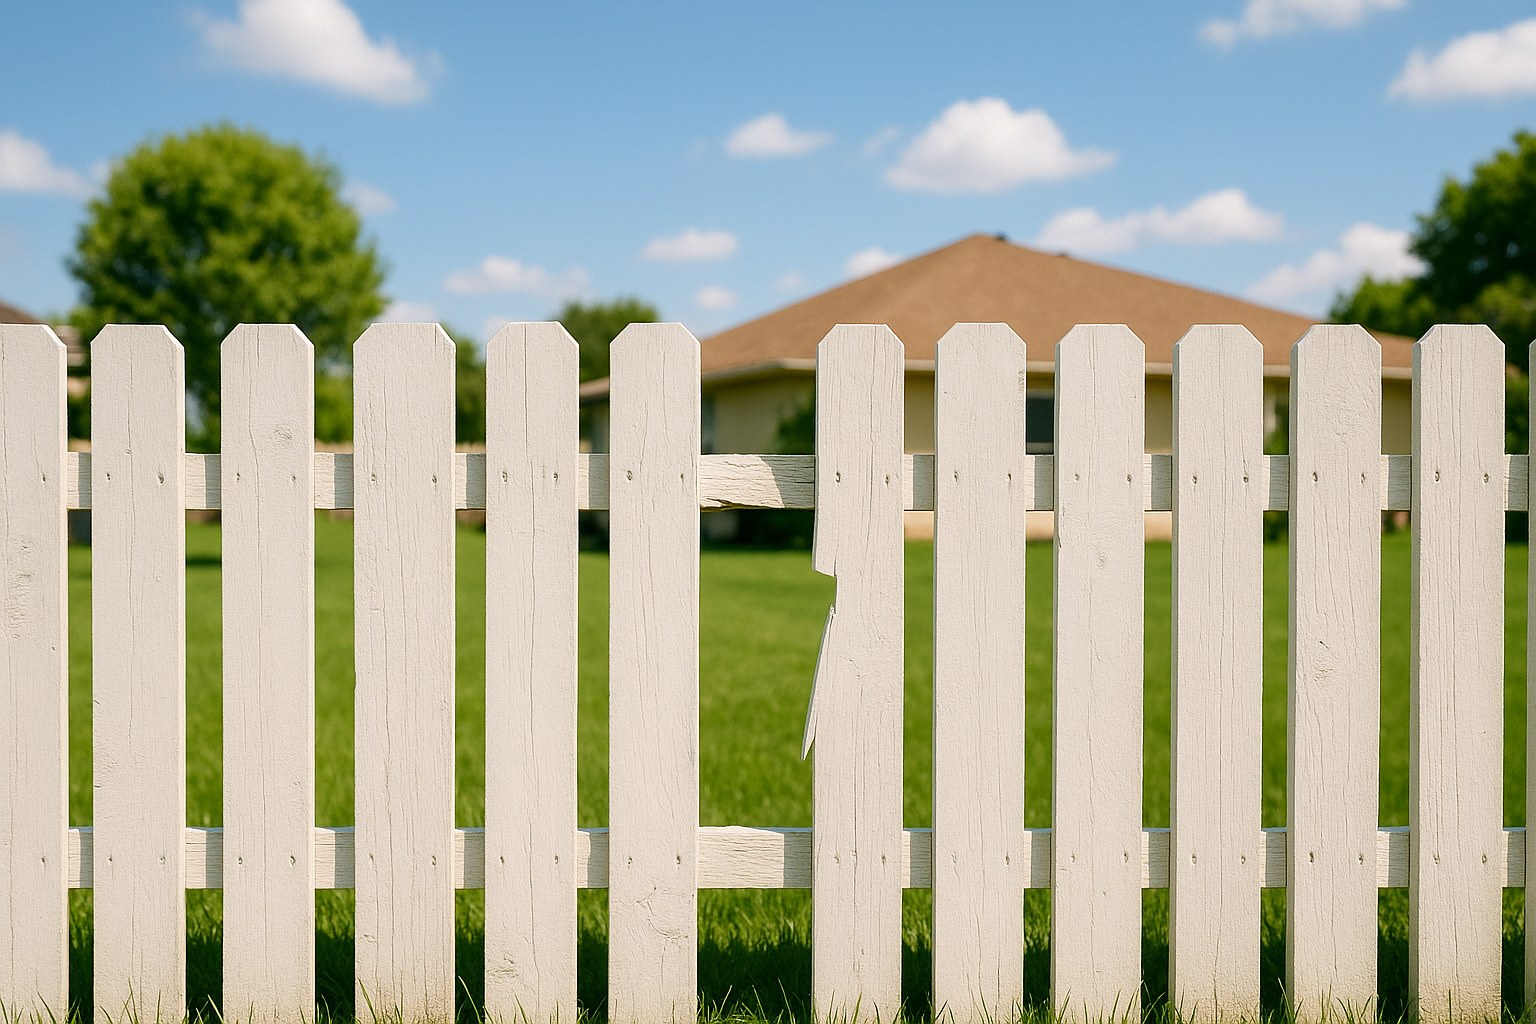
A beautiful fence can frame your property perfectly, offering privacy, security, and a boost to your home's curb appeal. But when a storm hits or time takes its toll, a single broken or missing picket can stick out like a sore thumb. That gap not only looks bad but can also be an escape route for a curious pet or an invitation for neighborhood pests.
The good news? You don't have to live with it or immediately call in a professional. Replacing a fence picket is one of the most straightforward and rewarding DIY projects you can tackle over a weekend. Whether you have a classic wood fence or a modern vinyl one, we’re here to walk you through every step of the process.
Think of me as your expert on the line, guiding you from diagnosis to the finished repair. Let’s get that fence looking as good as new!
Why You Shouldn't Ignore a Damaged Fence Picket
It’s easy to put off a small repair like a single broken picket, but there are a few compelling reasons to fix it sooner rather than later:
- Curb Appeal: A well-maintained fence significantly contributes to your home's overall look. A broken fence can make a property appear neglected.
- Security and Safety: Fences are designed to keep things in (like pets and children) and keep things out. A gap is a weak point that compromises that basic function.
- Preventing Further Damage: A missing picket can put extra stress on the adjacent pickets and rails, especially during high winds. This can lead to a cascade of failures, turning a small, inexpensive fix into a much larger, costlier repair. According to data from real estate experts, features that enhance curb appeal and functionality, like a pristine fence, can increase a home's perceived value.
Step 1: Your Initial Fence Inspection
Before you grab your tools, let’s do a little detective work. A thorough inspection will tell you exactly what you’re dealing with and ensure you’re not just patching up a symptom of a bigger problem.
First, put on a pair of work gloves and safety glasses. Even a simple inspection can involve splintered wood or sharp edges.
- Walk the Fence Line: Start at one end and walk the entire length of your fence. Locate the damaged picket(s), but don't stop there.
- Check the Structure: Stand back and look at the overall fence line. Are the main posts (the thick vertical supports) straight, or are they leaning? Look closely at the horizontal rails that the pickets are attached to. Do you see any major cracks, sagging, or signs of rot?
- Test the Neighbors: Gently push on the pickets surrounding the broken one. Do they feel solid, or are they wobbly and soft? This can indicate rot or loose fasteners that you'll want to address at the same time.
- Identify the Material: Determine what your fence is made of.
- Wood: You'll see wood grain, feel a natural texture, and it will likely be stained or painted. Cedar and pressure-treated pine are common.
- Vinyl: This material looks and feels like plastic. It's often white and has a smooth, uniform finish. You may see seams or caps on the posts.
- Composite or Metal: If it’s not wood or vinyl, you may have a composite (a mix of wood and plastic) or metal (like aluminum or steel) fence. These often require specialized repair methods.
Is This a DIY Job or Time to Call a Pro?
Your inspection will give you a clear answer.
Call a Fencing Contractor if:
- You discover that the posts or rails are cracked, rotting, or leaning. The structural integrity of the fence is compromised, and simply replacing a picket won't fix the underlying issue.
- You find widespread rot or damage affecting many pickets.
- Your fence is made of metal, composite, or another material you're not comfortable working with.
This is a perfect DIY job if:
- The damage is limited to one or just a few pickets.
- The posts and rails are strong, straight, and in good condition.
Fixing a single picket yourself can cost as little as $5 to $20 for materials. Hiring a professional for a small repair job like this could cost anywhere from $100 to $300, so the savings are significant!
Step 2: How to Replace a Wood Fence Picket
If you've determined you have a wood fence with a solid structure, you're ready to get to work. We'll cover replacing both broken and completely missing pickets.
Tools & Materials You'll Need:
- Work gloves and safety glasses
- Replacement wood picket (try to match the wood type, e.g., cedar)
- Measuring tape
- Pencil
- Hand saw or circular saw
- Hammer or drill
- Pry bar or putty knife
- Fasteners: Galvanized nails or outdoor/deck screws
- Medium-grit sandpaper
- Outdoor paint or stain to match your fence
If You Have a Broken Picket:
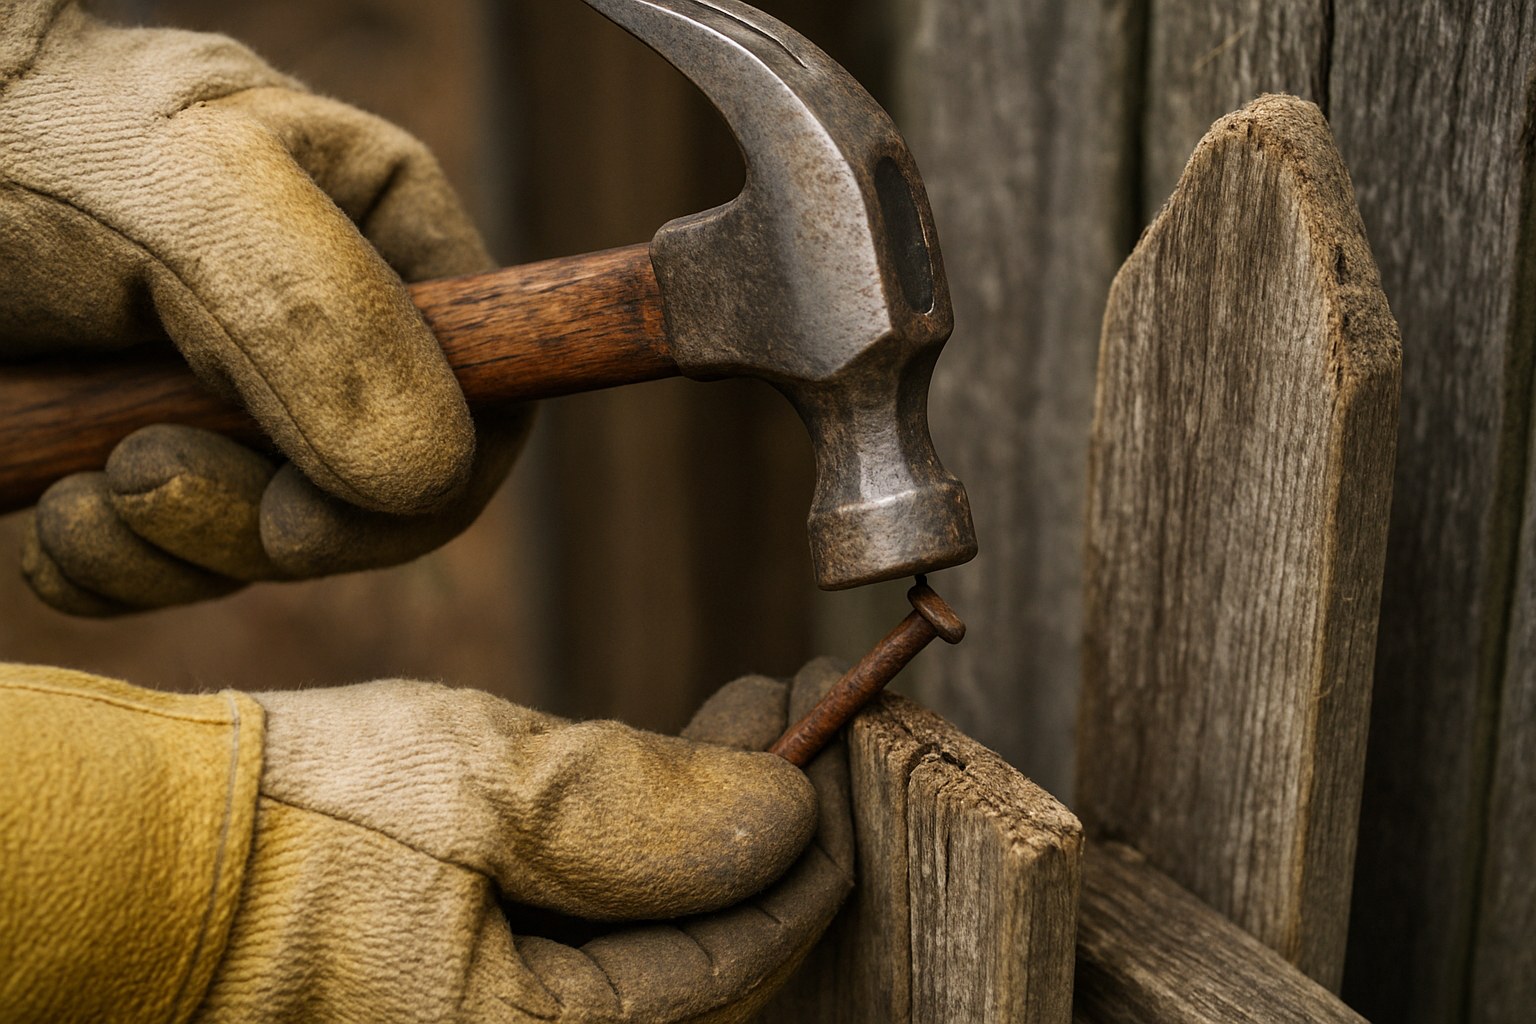
- Remove the Remnants: The first step is to clear out the old, broken pieces. Use the claw of your hammer or a pry bar to carefully pull out any nails holding the broken sections to the rails. If screws were used, simply back them out with your drill.
- Clear Away Debris: Sometimes, splintered wood fragments get stuck to the rail. Use a putty knife to gently scrape them off, creating a clean surface for the new picket.
Installing the New Wood Picket:
Whether you just removed a broken picket or are filling a gap where one went missing, the installation process is the same.
- Measure and Mark: Measure the height of the neighboring pickets to determine the length you need for the new one. If your fence is on a slope, you may need to account for an angled cut at the top or bottom. Use a straight edge laid across the tops of the adjacent pickets to find the right line. Mark the cut line on your new picket with a pencil.
- Cut to Size: Carefully cut the picket to the correct length using your hand saw. After cutting, lightly sand the cut edge with medium-grit sandpaper to smooth it out and prevent splinters.
- Position the Picket: Place the new picket in the gap. Align the top with its neighbors to ensure a uniform look.
- Fasten It Securely: Now, let's lock it in place. Check how the other pickets are attached.
- If using nails: Drive two galvanized nails through the picket into the top rail, and two more into the bottom rail. Using galvanized nails is crucial to prevent rust streaks from running down your fence.
- If using screws: For extra holding power, use outdoor-rated wood screws. It's a good idea to drill small pilot holes first to prevent the wood from splitting. Drive one or two screws through the picket into each rail.
- Finish to Match: The final step is to make it blend in. Wipe away any sawdust and apply a coat of your matching outdoor paint or stain. It might take a day or two to fully dry, depending on the weather. A new piece of wood can sometimes look lighter even with the same stain; it will weather and blend in over time.
Give the new picket a gentle shake. If it feels solid and looks uniform, congratulations—you've successfully repaired your fence!
Step 3: How to Replace a Vinyl Fence Picket
Vinyl fence repair is often even easier than wood, as the pieces are designed to lock together.
Tools & Materials You'll Need:
- Work gloves and safety glasses
- Replacement vinyl picket (it's very important to get an identical match from the manufacturer if possible)
- Flathead screwdriver
- Damp cloth
Replacing the Damaged Vinyl Picket:
- Inspect and Locate Tabs: First, confirm again that the horizontal rails aren't cracked. A vinyl picket is usually held in place by tabs that fit into slots in the rails. Look closely at where the top and bottom of the damaged picket meet the rails.
- Release the Picket: Gently insert a flathead screwdriver into the slot on the side of the rail near the top of the picket. Give it a slight twist to disengage the locking tab. You should feel the picket loosen.
- Remove the Old Picket: Once the top is loose, pull the picket upward to slide it out of the slot in the bottom rail.
- Install the New Picket: Take your new, identical vinyl picket. First, slide the bottom end down into the slot in the lower rail. Then, align the top of the picket with the upper rail's slot and push it down firmly until you hear or feel the locking tab snap into place.
- Final Cleanup: Give the new picket a quick wipe with a damp cloth to remove any smudges or fingerprints.
Check that the picket is locked in firmly and aligned with its neighbors. That’s it! Your vinyl fence is back in pristine condition.

Take Pride in Your Home Maintenance
Fixing a broken fence picket is more than just a repair—it's about restoring the pride you have in your home. With just a few tools and a little bit of time, you can tackle this project yourself, saving money and gaining valuable DIY experience.
Want to make home maintenance even easier? Download the Casa app today! Casa is your personal home management assistant, putting expert guides, maintenance reminders, and project tracking right at your fingertips. And if you ever run into a job that feels too big, Casa can connect you with trusted, local professionals to get it done right. Take the guesswork out of homeownership and let Casa help you every step of the way.


